My family doesn't like the smell of my 3D printer, even when printing PLA. Here's my solution.

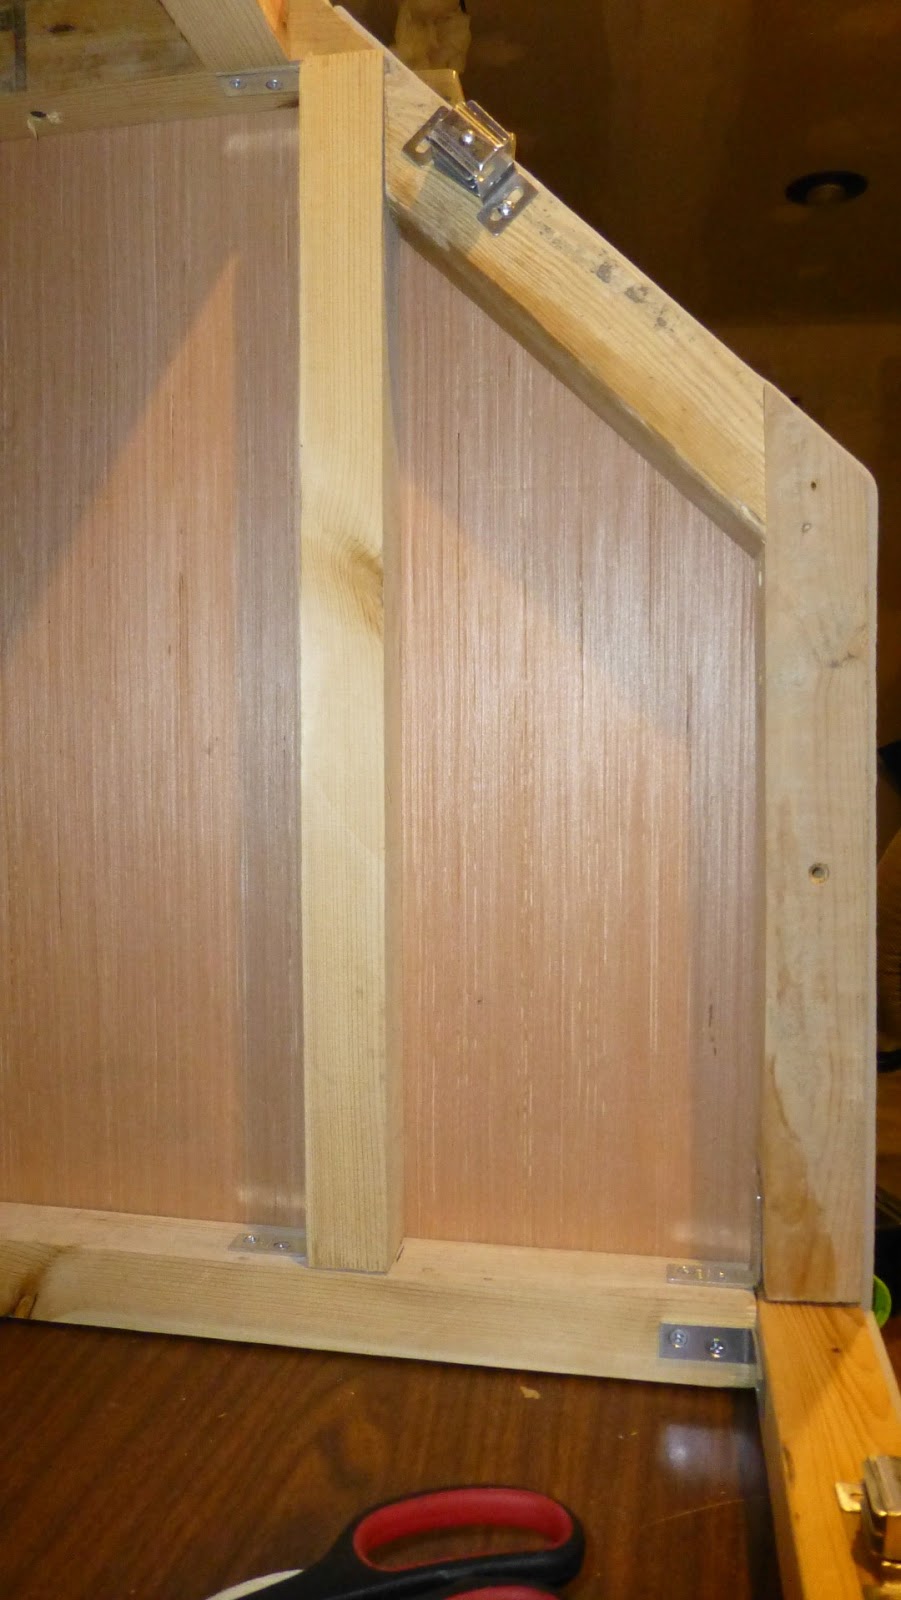
Construction is pretty straightforward. A basic frame is built from 2x4s ripped in half lengthwise, joined with L brackets.
The angle at the front was achieved by just temporarily installing the front bit then drawing a line at about a 45 degree angle and installing a second bit. I just kind of made the whole thing up as I went along.
Before the plywood was installed, the plexiglas was cut to width and clamped at the bottom vertical piece with a small gap up from the table, with a support piece temporarily screwed into place behind and below where the first bend was to be. I used a heat gun to soften it until I could make a good bend, using another piece of wood and clamps to make the corner well defined. I then repeated for the top bend.
For the sides, Luan plywood was cut to fit. On the angles, I just cut the square sides, temporarily screwed them to the piece, marked, removed, cut and put back.

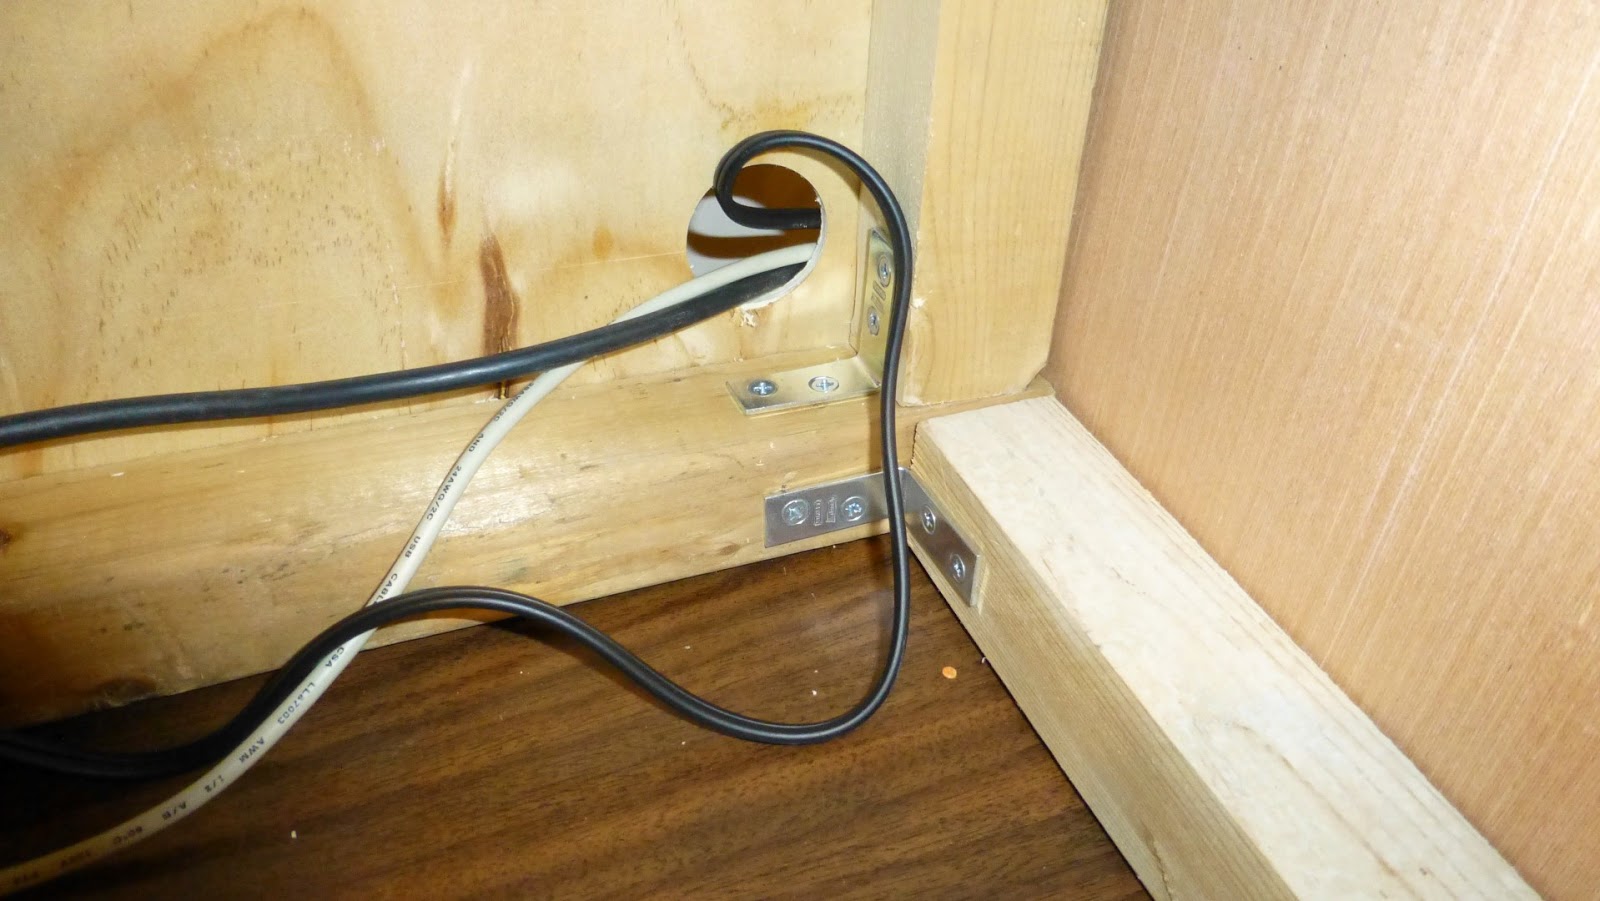
Since the unit can't be actually sealed due to needing to run the filament and power cords and such in, I didn't make a huge effort to seal the wood joints. I did install inexpensive 3/16" foam weatherstripping around the bottom where it meets the table, and also along all the sides where the plexi front goes on.
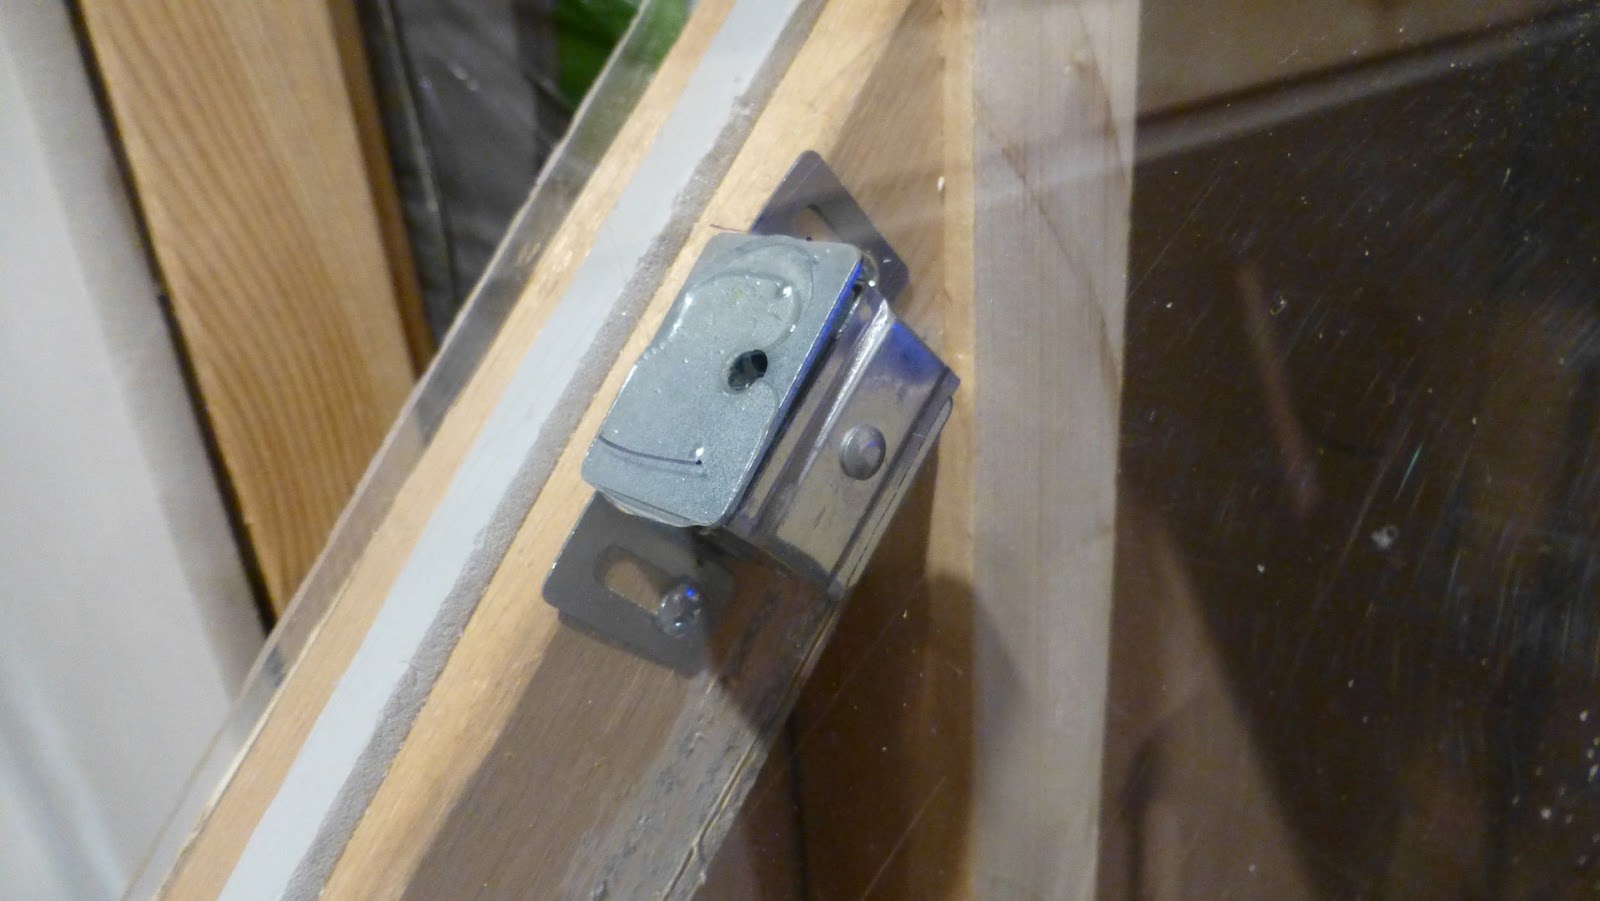
I used four heavy duty magnetic cabinet catches to hold the plexi front on, they are more than sufficient. The plates are epoxied to the plexi.
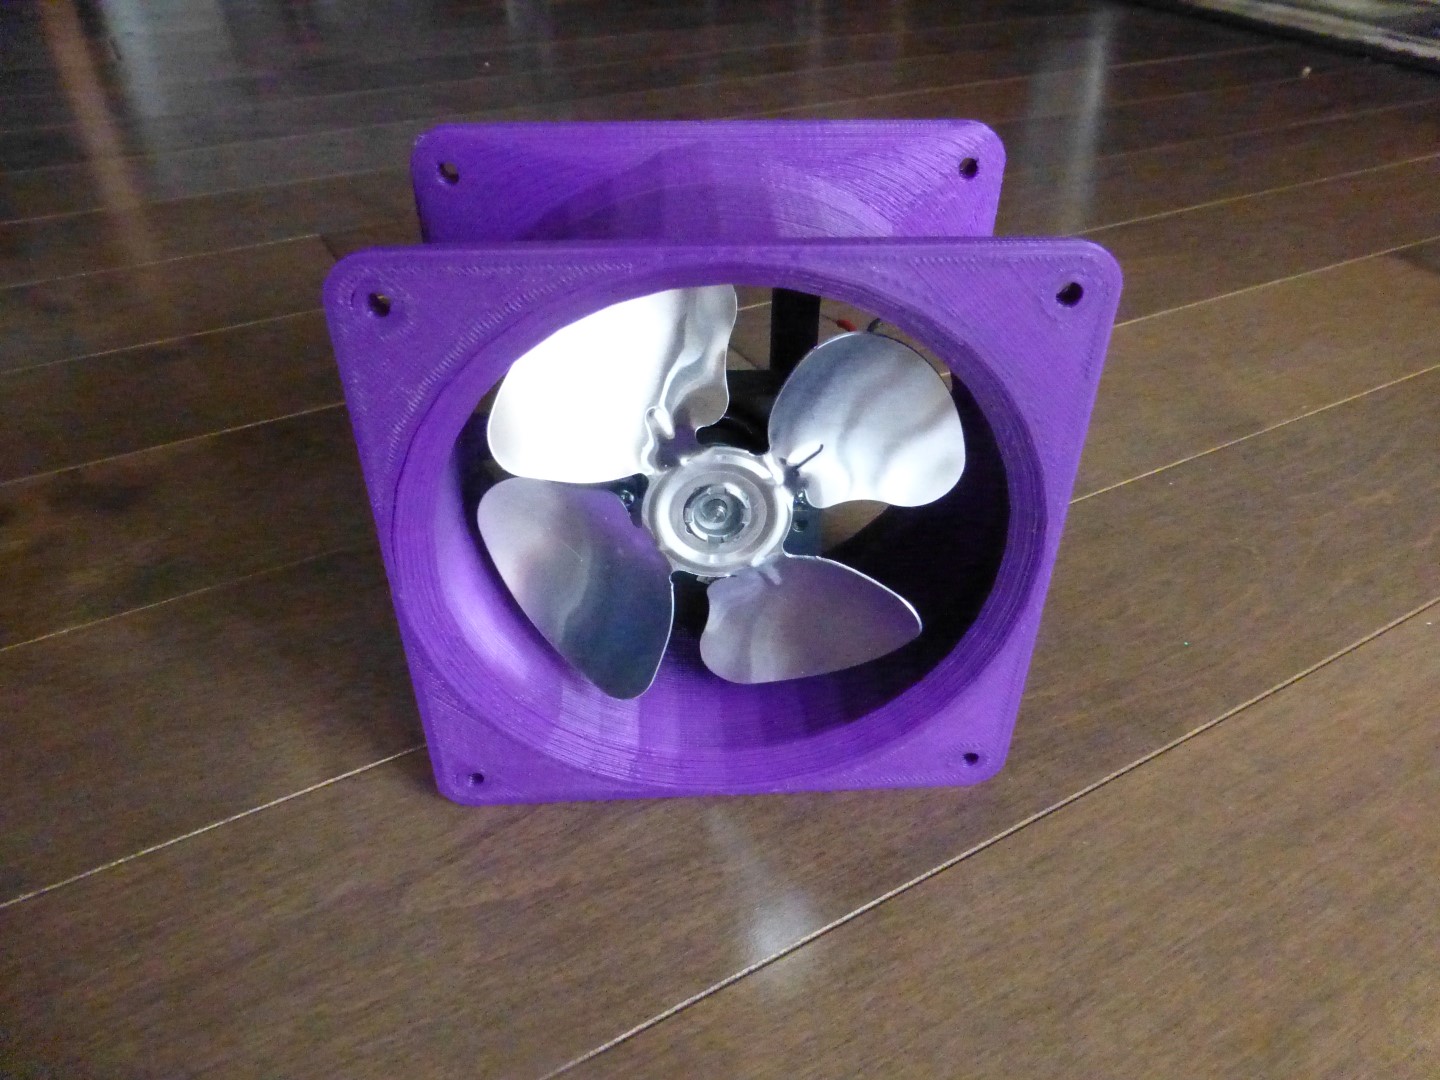
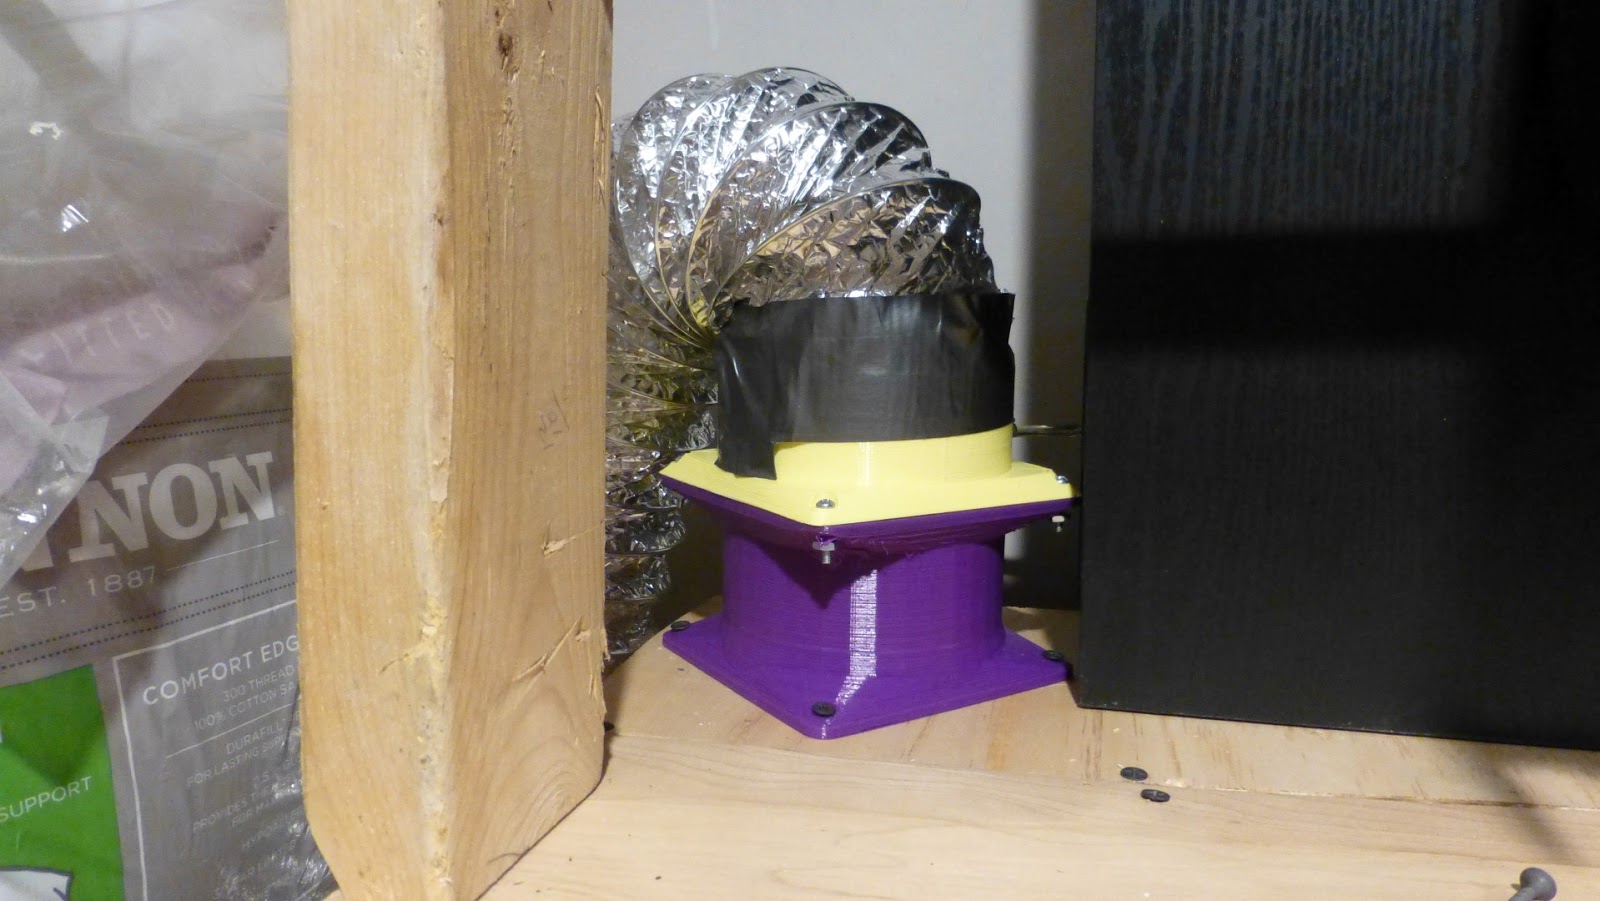
Venting is out through a 4 inch flexible clothes drier flexible hose and an outside vent. Since I already had the adapter and hose from the previous attempt at making a hood, but I wanted more air movement than a computer fan would provide, I bought one of the cheap 4 inch "Polar Wind" brand desk fans, took it apart, designed and printed a housing that makes it mount just like a computer fan but thicker. The design is available by clicking here to go to Youmagine.
Here it is in place and running:
The fan has plenty of power, with it running I can hold a lit match near any of the openings on the unit and the flame is drawn toward the inside of the box.
I cut a slot on the top about 1/2 inch wide and running most of the length of the unit. This is to allow filaments to enter the top. I lined the edge with duct tape, it just seemed like a good idea.

I hadn't intended this to be a noise proofing measure, but since we also have a video projector in this room to watch movies, it's a great side benefit that with the front in place, even with the fan running, it's much quieter than it would be otherwise.
Both the fan and the printer are plugged into the switched power outlet strip sitting to the right of the box.
Construction is pretty straightforward. A basic frame is built from 2x4s ripped in half lengthwise, joined with L brackets.
The angle at the front was achieved by just temporarily installing the front bit then drawing a line at about a 45 degree angle and installing a second bit. I just kind of made the whole thing up as I went along.
Before the plywood was installed, the plexiglas was cut to width and clamped at the bottom vertical piece with a small gap up from the table, with a support piece temporarily screwed into place behind and below where the first bend was to be. I used a heat gun to soften it until I could make a good bend, using another piece of wood and clamps to make the corner well defined. I then repeated for the top bend.
For the sides, Luan plywood was cut to fit. On the angles, I just cut the square sides, temporarily screwed them to the piece, marked, removed, cut and put back.
Since the unit can't be actually sealed due to needing to run the filament and power cords and such in, I didn't make a huge effort to seal the wood joints. I did install inexpensive 3/16" foam weatherstripping around the bottom where it meets the table, and also along all the sides where the plexi front goes on.
I used four heavy duty magnetic cabinet catches to hold the plexi front on, they are more than sufficient. The plates are epoxied to the plexi.
Venting is out through a 4 inch flexible clothes drier flexible hose and an outside vent. Since I already had the adapter and hose from the previous attempt at making a hood, but I wanted more air movement than a computer fan would provide, I bought one of the cheap 4 inch "Polar Wind" brand desk fans, took it apart, designed and printed a housing that makes it mount just like a computer fan but thicker. The design is available by clicking here to go to Youmagine.
Here it is in place and running:
The fan has plenty of power, with it running I can hold a lit match near any of the openings on the unit and the flame is drawn toward the inside of the box.
I cut a slot on the top about 1/2 inch wide and running most of the length of the unit. This is to allow filaments to enter the top. I lined the edge with duct tape, it just seemed like a good idea.
I hadn't intended this to be a noise proofing measure, but since we also have a video projector in this room to watch movies, it's a great side benefit that with the front in place, even with the fan running, it's much quieter than it would be otherwise.
Both the fan and the printer are plugged into the switched power outlet strip sitting to the right of the box.